Image Enhancement |
  
|
Image Enhancement |
|
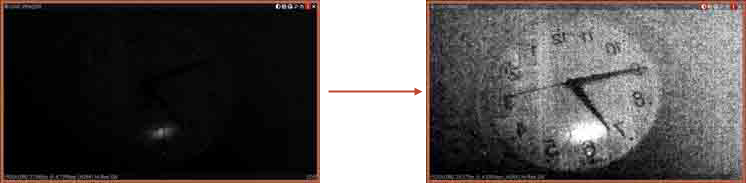
To enhance the image on darker scenes, Nx Witness offers Image Enhancement. Not only can this feature be applied to Cameras, it can also enhance local files and pictures as well.
To activate Image Enhancement, click on the ![]() button located on the item:
button located on the item:
![]() Note: Export and Taking Screenshots features will depend on this setting as well: if dewarping is enabled, the screenshot will be dewarped automatically and the Export dialog will suggest this feature (can be disabled).
Note: Export and Taking Screenshots features will depend on this setting as well: if dewarping is enabled, the screenshot will be dewarped automatically and the Export dialog will suggest this feature (can be disabled).
To adjust additional settings:
1.Invoke Context Menu and select Image Enhancement… (or use Alt + J). The following dialog will open:
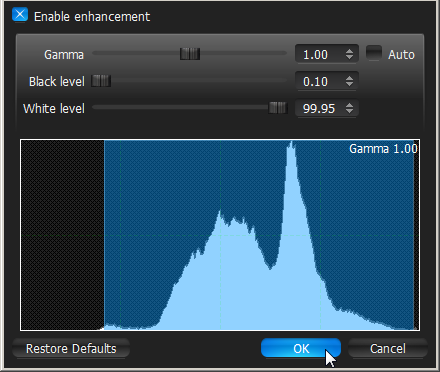
2.Click Enable enhancement and configure desired parameters:
•Gamma – the lesser the value, the lighter the image will be. Set Auto for recommended values.
•Black and White Levels (information is located in the Histogram section). Refrain from cutting too much of left or right areas on the histogram – this will result in losing important graphical information.
•Click Restore Defaults to reset settings.
3.Click Apply or OK when finished. To discard changes, click Cancel.
![]() Note: in most cases, it is not necessary to perform any additional adjustments.
Note: in most cases, it is not necessary to perform any additional adjustments.