Viewing Full Camera List |
  
|
Viewing Full Camera List |
|
All Cameras registered in Nx Witness are displayed in Resource Tree. If may be problematic to find a particular camera when too many Cameras appear in Tree. It is possible to use Search to locate Cameras on Scene.
To use a more organized list, open Main Menu and select Camera List... (or press CTRL + M).
The information is broken down by the following columns:
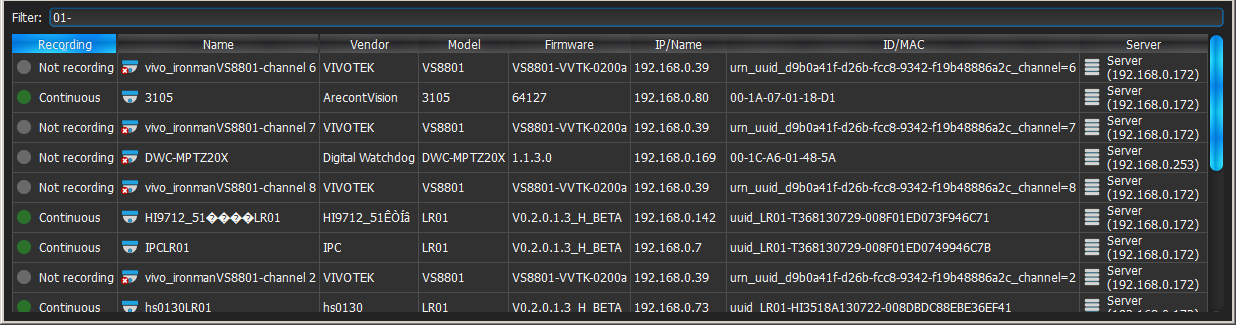
•Recording – recording of Camera (Not recording, Continuous, Motion only, Motion + Lo-Res). See "Setting up Recording Schedule".
![]() Note: this is not an indication on how Camera is being recorded.
Note: this is not an indication on how Camera is being recorded.
•Name – Camera name.
•Driver – Camera's manufacturer/maker. When interacting with a 3rd party Cameras via Onvif protocol, OnvifDevice is displayed.
•Model of Camera.
•Firmware – the current firmware version.
•IP/Name – Camera's IP address.
•ID/MAC – Camera's MAC address. It is not possible at times to determine the MAC address. In this instance, a unique identifier is shown (i.e. urn_uuid_207f19b2-d5a6-407f-8fec-6265a311058b)
•Server – the Server Camera is hosted on.
The following tools are available to manage Camera List:
•Sort data by column. Left Click on column's header.
•Filter data. Type the filter sub-string into the Search String field (on the top). The results will be refresh as typing. To disable filtering, clear the sub-string.
•Select several rows from the table. Drag the mouse, use CTRL + Click/Up/Down arrows, or Shift + Click/Up/Down arrows. Use CTRL + A to select all Cameras.
•Open one or several Cameras. Select the desired Cameras, open Context Menu and choose Open, Open in New Tab, Open in New Window.
•Rename Cameras. Select Camera, open Context Menu and choose Rename.
•Viewing Camera's event history. Select Camera, open Context Menu and choose Check Camera Issues... Event History form will open and filtering against the selected Camera will apply.
•Delete one or multiple Cameras. Select the desired Cameras, open Context Menu and choose Delete.
•Go to Cameras Settings. Select the desired Cameras, open Context Menu and choose Camera Settings...
•Export data from one or multiple Cameras to an external file. Select the desired Cameras, open Context Menu and choose Export Selected to File... Select file name and format. The following formats are supported:
•HTML File
•CSV file (text file with delimiters). This file type can easily be imported into Microsoft Excel.
•Copy one or several rows to clipboard. Select the desired rows, open Context Menu and choose Copy Selection to Clipboard. The data can be pasted into any text editor or Microsoft Excel.